How to remodel a Staircase with Retro-Fit Stair Treads
Butterscotch Oak Retro-Fit Stair Treads | Customer Photos
To view this image gallery, you must have and enable JavaScript and the Flash Player.
Build an Oak Butterscotch Staircase Like This
To complete this project, Cheryl used the parts below. You'll want to change the lengths and quantities for your particular staircase, but this list should be a good start. If you have any questions along the way, drop us an e-mail and we'll be happy to help you select the right components for your new stairs.
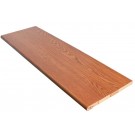
Red Oak Butterscotch Retro Stair Tread Closed 36" wide - Prefinished and ready to install - No staining or finishing required. Use for overlaying an existing closed staircase with a wall on both sides. Learn More
The "standard" 3ft steps (including another staircase not pictured)
The majority of Cheryl's steps were 36" long or shorter, so the 36" long prefinished stair treads were long enough to trim each side to the required angles along the skirtboard on the left and right sides of the step.
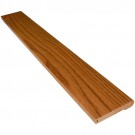
Cheryl's bottom two steps are wider than the others so she used this tread to have enough material to cut the angle along the right side of the second step from the bottom.
The bottom step is the longest tread in her staircase and had to have the right side cut on an angle to cover the existing tread - she measured and 60" gave her enough material to make the cut.
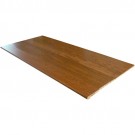
See photo 7. Cheryl's staircase makes a 90-degree turn to the left with two platforms (each measured roughly 36-37" from left-to-right). The landing tread was cut in half and installed along the front edge of each landing to create the rounded "nose" on the front of each landing.
The 3/4" thick x 11" wide panels fit together much like hardwood flooring to cover both intermediate landings (roughly 3' x 3' each). Each T&G panel provides 11" of coverage to quickly fill the majority of the landing, and since each panel covers 11", 4 panels were needed for each landing (3 full-width panels and the 4th panel against the wall is ripped to the required dimensions). Working from the wall to the front of the step, the tongue of the final panel fits nicely into the groove on the landing tread.
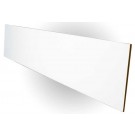
Just as with the treads, each step needs a new retro-fit riser installed along the front face to provide a clean, paintable surface. The retro-fit risers can be shimmed as necessary to cover any imperfections or minor gaps in the existing structure.
Just as with the 48" tread, a longer riser is needed for the second step from the bottom. Cheryl determined a 48" long riser would be long enough to cover the existing riser on the second step from the bottom.


Log In