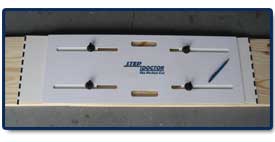
The Step Doctor is a one of a kind tool used for measuring treads and risers. It has few moving parts and is nearly indestructible. Unlike other stair tools that bend and distort, the Step Doctor will always keep its shape, therefore always giving you the Perfect Cut. By being so simple and efficient, the Step Doctor will save you installation time and keeps you from making costly mistakes when cutting treads and risers. As you know, treads and risers can be expensive, especially in exotic wood species, so anything you can do to keep from making cutting errors is money in your pocket. The design is so easy and exact; it can be used by both the handyman and professionals! The Step Doctor is a patent pending tool that makes a perfect template of the step opening. This allows you to mark and cut each tread or riser to fit each opening exactly.
- The Step Dr. is made from 100% post-consumer recycled plastics - even the knobs are made from plastic reclaimed during the manufacturing process.
- Each and every Step Dr. is 100% made in the USA.
Product Details
This product is patent pending and made of a high strength plastic used in the automotive industry that will not break, warp or distort. It is 11" wide and extends from 30" to 48" long to fit most any size step. We also offer a
Deluxe Step Doctor for steps up to 60".
| |
Standard Model: |
Deluxe Model: |
| Minimum Measurement Length: |
30" |
42" |
| Maximum Measurement Length: |
48" |
60" |
3 Easy Steps For Constructing Treads and Risers
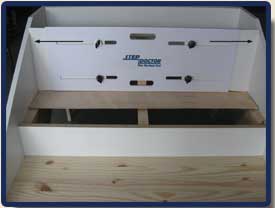
STEP 1: POSITION THE STEP DOCTOR
Place
Step Doctor on existing tread or stringer.
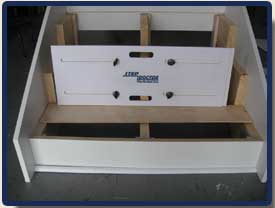
Or position on edge for riser
Position flat for tread
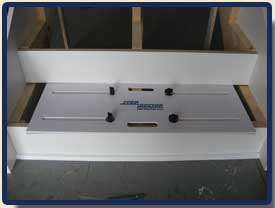
STEP 2: EXTEND WINGS
Extend wings flush to skirt board on both sides; tighten wing nuts.
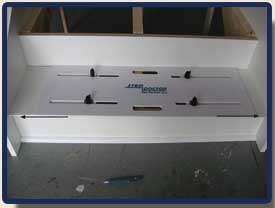
STEP 3: CUT TREAD OR RISER
Remove
Step Doctor and place on new tread or riser; mark and cut.
Helpful Hints
RISERS
Construct the risers using the Step Doctor: Follow the 3 easy steps to create the first two risers: STEP 1: Position the Step Doctor on its edge beginning on the bottom step. STEP 2: Extend the wings out flush with the skirt board on each side of the step. Tighten the wing nuts, ensuring there is no space between the Step Doctor and skirt board. STEP 3: Place the Step Doctor on the new riser; mark and cut. When marking the new riser, align the bottom edge of the Step Doctor with the bottom edge of the new riser (bottom to bottom for risers). A compound miter saw is recommended to ensure a clean cut.
Install the risers:
When attaching the new risers, allow approximately 1/16 inch above the front edge of the stringer. Use a quality construction adhesive on each riser and tread along with nails or screws.
TREADS
Construct the treads using the Step Doctor: STEP 1: Position the Step Doctor flat on the stringer or temporary tread against the new riser. STEP 2: Extend the wings out flush with the skirt board on each side of the step. Tighten the wing nuts, ensuring there is no space between the Step Doctor and skirt board. STEP 3: Place the Step Doctor on the new tread; mark and cut. When marking the new tread, align the top edge of the Step Doctor with the back edge of the new tread (top to back for treads). A compound miter saw is recommended to ensure a clean cut.
Install the treads:
Attach each tread using a quality construction adhesive and nails or screws as you did with the risers. Continue positioning, marking and cutting each riser and tread until complete.


Log In